Session box download
Author: s | 2025-04-24
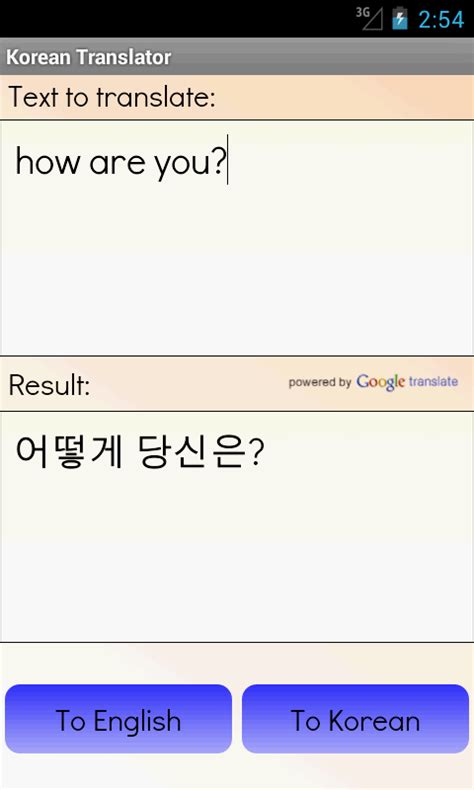
Session Box Multi session box extension session box chrome how to use session box chromeLink dwonload multi session box Session Box Multi session box extension session box chrome how to use session box chromeLink dwonload multi session box

Session Box Multi session box extension session box chrome
Panel symbol (which will be like a Plus symbol) in the middle of the screen. Now move the mouse to the bottom of the plus, which will high-light the bottom portion of the screen indicating that the qa-box session will be moved to the bottom panel. Fig: Select the Panel to dock a PuTTY session Now, release the mouse, which will move the qa-box to the bottom panel as shown below.Fig: Selected PuTTY session docked in proper panel Using the similar technique you can move all the PuTTY sessions to different panels as shown below.Fig: Multiple PuTTY Sessions docked appropriatelyFeature 3: Encrypted PuTTY Configuration DatabaseBy default, PuTTY session informations are stored in the windows registry, which are not encrypted. If you want to keep the session information (ip-address, session name etc.,) encrypted, you can use the database encryption feature available in the PuTTY CM Download the AES encryption library (pcmcrypt.dll) from PuTTY CM website.Place this file in the PuTTY CM program folder. C:\Program Files\PuTTY Connection ManagerRestart the PuTTY CMGo to Tools menu -> Options -> Database -> under the Encryption section, the available algorithms should display “AES Rinjdael Managed” as shown below, indicating that the encryption library is successfully installed.Fig: Enable Encryption Click on File -> New -> Database and enter the appropriate information as shown below to create a secure PuTTY session database. Follow the best practices to create a strong password while choosing the passphrase for the secure database. Database Name: putty-secure-sessionsClick on Enable database encryption check-boxSelect “AES Session Box Multi session box extension session box chrome how to use session box chromeLink dwonload multi session box Applies ToWindows 10 Enterprise Multi-Session Symptoms Windows 10 Enterprise Multi-Session, version 1909 (Azure Virtual Desktops (AVD)) might not receive the monthly security updates from Windows Server Update Services (WSUS). Cause This behavior was investigated and addressed in KB5005566. Workaround Use one of the following methods to work around this issue. Method 1: Deploy images from Azure Marketplace Microsoft maintains up-to-date images which include all security updates on Azure Marketplace. We recommend that you deploy the latest image to your existing devices which run Windows 10 Enterprise Multi-Session, version 1909 (Azure Virtual Desktops (AVD)). For more information about Microsoft Windows Server plans and pricing, please see the Azure Marketplace. Method 2: Download monthly security updates Microsoft publishes monthly security updates on the second Tuesday of each month. You can download these updates from the Microsoft Update Catalog as Microsoft Update (.msu) files and deploy them using your management solution. Use the following steps to download the missing security updates manually. Go to In the Search box, in the upper-right corner of the page, type “2021-xx Cumulative Update for Windows 10 Version 1909”. The “xx” is the two-digit month number. For example, for the first update available in June, the search box should contain “2021-06 Cumulative Update for Windows 10 Version 1909”. Note The example and screenshots in this document show the search for the June 2021 updates. From the list of results, select the available “Cumulative Update” packages. In the Classification column, the updates you want show, “Security Updates.” Download the Cumulative Update for Windows 10 Version 1909 packages for the platforms you have in your organization, such as: Arm64-based systems x86-based systems x64-based systems There might also be Cumulative Updates for .NET in the search results with a Classification of “Updates”. Download these and deploy them as well. These downloadsComments
Panel symbol (which will be like a Plus symbol) in the middle of the screen. Now move the mouse to the bottom of the plus, which will high-light the bottom portion of the screen indicating that the qa-box session will be moved to the bottom panel. Fig: Select the Panel to dock a PuTTY session Now, release the mouse, which will move the qa-box to the bottom panel as shown below.Fig: Selected PuTTY session docked in proper panel Using the similar technique you can move all the PuTTY sessions to different panels as shown below.Fig: Multiple PuTTY Sessions docked appropriatelyFeature 3: Encrypted PuTTY Configuration DatabaseBy default, PuTTY session informations are stored in the windows registry, which are not encrypted. If you want to keep the session information (ip-address, session name etc.,) encrypted, you can use the database encryption feature available in the PuTTY CM Download the AES encryption library (pcmcrypt.dll) from PuTTY CM website.Place this file in the PuTTY CM program folder. C:\Program Files\PuTTY Connection ManagerRestart the PuTTY CMGo to Tools menu -> Options -> Database -> under the Encryption section, the available algorithms should display “AES Rinjdael Managed” as shown below, indicating that the encryption library is successfully installed.Fig: Enable Encryption Click on File -> New -> Database and enter the appropriate information as shown below to create a secure PuTTY session database. Follow the best practices to create a strong password while choosing the passphrase for the secure database. Database Name: putty-secure-sessionsClick on Enable database encryption check-boxSelect “AES
2025-04-01Applies ToWindows 10 Enterprise Multi-Session Symptoms Windows 10 Enterprise Multi-Session, version 1909 (Azure Virtual Desktops (AVD)) might not receive the monthly security updates from Windows Server Update Services (WSUS). Cause This behavior was investigated and addressed in KB5005566. Workaround Use one of the following methods to work around this issue. Method 1: Deploy images from Azure Marketplace Microsoft maintains up-to-date images which include all security updates on Azure Marketplace. We recommend that you deploy the latest image to your existing devices which run Windows 10 Enterprise Multi-Session, version 1909 (Azure Virtual Desktops (AVD)). For more information about Microsoft Windows Server plans and pricing, please see the Azure Marketplace. Method 2: Download monthly security updates Microsoft publishes monthly security updates on the second Tuesday of each month. You can download these updates from the Microsoft Update Catalog as Microsoft Update (.msu) files and deploy them using your management solution. Use the following steps to download the missing security updates manually. Go to In the Search box, in the upper-right corner of the page, type “2021-xx Cumulative Update for Windows 10 Version 1909”. The “xx” is the two-digit month number. For example, for the first update available in June, the search box should contain “2021-06 Cumulative Update for Windows 10 Version 1909”. Note The example and screenshots in this document show the search for the June 2021 updates. From the list of results, select the available “Cumulative Update” packages. In the Classification column, the updates you want show, “Security Updates.” Download the Cumulative Update for Windows 10 Version 1909 packages for the platforms you have in your organization, such as: Arm64-based systems x86-based systems x64-based systems There might also be Cumulative Updates for .NET in the search results with a Classification of “Updates”. Download these and deploy them as well. These downloads
2025-04-09Check box. The administrator specifies parameters which are passed by Edge Client to the script file. These parameters are defined by the session variable session.edgeclient.scripting.logoff.params. The client retrieves parameters from BIG-IP after session establishment. The administrator has the flexibility to set up variable values according to policy branching. Each time the Edge Client closes an APM session, the configured script is invoked. On macOS, the script is located at /Library/Application Support/F5Networks/EdgeClient/Scripting/onSessionTermination.bat. The Run session log off script check box is cleared by default. To enable the client to display a warning before launching the pre-defined script on session termination, select Show warning to user before launching script check box.This is selected by default. To support automatic reconnection without the need to provide credentials again, allow password caching. Select the Allow Password Caching check box.This check box is cleared by default. The remaining settings on the screen become available. To require device authentication to unlock the saved password, select Require Device Authentication. This option links the option to use a saved password to a device authentication method. Supported device authentication methods include PIN, passphrase, and biometric (fingerprint) authentication on iOS and Android. Android devices also support pattern unlocking. From the Save Password Method list, select disk or memory.If you select disk, Edge Client caches the user's password (in encrypted form) securely on the disk where it is persisted even after the system is restarted or Edge Client is restarted. If you select memory, Edge Client caches the user's password within the BIG-IP Edge Client application for automatic reconnection purposes. If you select memory, the Password Cache Expiration (minutes) field displays with a default value of 240. If the Password Cache Expiration (minutes) field displays, retain the default value or type the number of minutes to save the password in memory. To enable automatic download and update of client packages, from the Component Update list, select yes (default). If you select yes, APM updates Edge Client software automatically on the client system when newer versions are available. Specify the list of APM servers to provide when the client connects.The servers you add
2025-04-01Services).If your virtual machines are running a Windows Server OS, you need to install the Remote Desktop Session Host role and then restart the virtual machine. For more information, see Install roles, role services, and features by using the Add Roles and Features Wizard.Sign in to your virtual machine as an administrator.Download the installation files for the Agent and the Agent Boot Loader by using the following links. If you need to unblock them, right-click each file, select Properties, select Unblock, and finally select OK.Azure Virtual Desktop AgentAzure Virtual Desktop Agent BootloaderTipThe Azure Virtual Desktop Agent download link is for the latest production version in non-validation environments. This download link is updated after the automatic production rollout is complete, so you might see a delay between the release of a production version and the update of the download link. After you install the Azure Virtual Desktop Agent, it's updated automatically. For more information about the rollout of new versions of the agent, see What's new in the Azure Virtual Desktop Agent?.Run the Microsoft.RDInfra.RDAgent.Installer-x64-.msi file to install the Remote Desktop Services Infrastructure Agent.Follow the prompts. When the installer prompts you for the registration token, paste it into the text box, which appears on a single line. Select Next, and then complete the installation.Run the Microsoft.RDInfra.RDAgentBootLoader.Installer-x64-.msi file to install the remaining components.Follow the prompts and complete the installation.After a short time, the virtual machines are listed as session hosts in the host pool. The status of the session hosts might initially appear
2025-04-16May only be a matter of hours before a determined attacker finds a way through your defenses.I realize that there are a multitude of variables and conditions for which people can say that these numbers are off (either too high or too low), depending on your defenses and attacker skill level. The point of presenting this data, however, is to have some form of metric available for active web application monitoring and defense discussions related to exploitation time lines.Penalty box: immediate active defenseHow can organizations use their WAF to significantly improve their time-to-hack metric? With the new Penalty Box capability provided by Akamai App & API Protector, WAF customers can implement an immediate, persistent block against an active attack session. If customers are using automated attack groups, they can protect their site or API from abusive clients by using the Penalty Box. Penalty Box configuration When WAF customers turn the Penalty Box on, any client whose request violates an attack group set to the action "Deny," will be placed in the penalty box. There, the action selected for the penalty box (either "Alert" or "Deny") continues to apply to any requests from that client for the next 10 minutes. After 10 minutes, the client moves out of the penalty box, and its requests are no longer denied, unless another request triggers a "Deny" action again and sends the client back to the penalty box for another 10 minutes. The main advantage of the Penalty Box feature is that it is able to quickly identify an active attack session and initiate a block, thus decreasing the effectiveness of automation used by the attacker.\r\nLet's take a look at a real-world example as displayed in the WSA dashboard.\r\n"}}"> When WAF customers turn the Penalty Box on, any client whose request violates an attack group set to the action "Deny," will be placed in the penalty box. There, the action selected for the penalty box (either "Alert" or "Deny") continues to apply to any requests from that client for the next 10 minutes. After 10 minutes, the client moves out of the penalty box, and its requests are no longer denied, unless another request triggers a "Deny" action again and sends the client back to the penalty box for another 10 minutes. The main advantage of the Penalty Box feature is that it is able to quickly identify an active attack session and initiate a block, thus decreasing the effectiveness of automation used by the attacker.Let's take a look at a real-world example as displayed in the WSA dashboard. WSA shows Penalty Box blocking an attack session In this screenshot, we can see a threat actor originating from Russia has initiated an attack session that lasted approximately one hour. During that time frame, the App and API Protector WAF denied several hundred attacks across multiple attack categories. Additionally, with Penalty Box enabled, the WAF also automatically blocked more than 9,000 requests that were part of the active attack session. Using the WSA Samples View,
2025-04-09Clipart Royalty Free Download Checkmark Clipart Jpeg - Box With Check Mark Clipart 490*400 4 1 Red Check Mark Box Approved Good Accepted Rating Feedback - Box With Red Check Mark 550*491 5 1 Crop Your - Empty Check Mark Box 512*512 4 3 Go Above And Beyond - Check Mark Box 400*391 2 1 Overview Clipart Student Checklist - Transparent Box With Check Mark 640*480 2 1 Plan Clipart Session Plan - Box With Check Mark Png 1000*988 0 0 Powerpoint Check Mark Symbol Clipart - Black Check Mark Symbol 600*527 14 4 Powerpoint Check Mark Symbol - Yellow Check Mark 600*532 11 5 Powerpoint Check Mark - Big Green Check Mark 600*508 18 7 Check Mark Symbol Powerpoint Clipart - Black And White Check Mark 400*400 16 6 Check Mark Symbol Powerpoint - Blue Check Mark 802*791 10 5 Red Check Mark In Red Clipart - Red And Blue Check Mark" title="Pics For > Red Check Mark In Red Clipart - Red And Blue Check Mark" src=" data-original=" Pics For > Red Check Mark In Red Clipart - Red And Blue Check Mark 2000*1789 6 2 Green Check Mark Transparent 600*578 63 41 Green Check Mark Clip Art Free Vector In Open Office - Check Mark With Face 1024*1024 19 10
2025-04-18